Blocked Ports
The software will not start properly if one of the ports are already blocked or is used.
- zapAudit occupies the ports 8055, 9001 (external communication) and 8059.
- zapCash occupies the ports 8056, 9002 (external communication) and 8060.
You can change the ports by modifying the server.xml file. Go to your installation directory to the subfolder 'conf' (e.g. C:\Users\YourWindowsUser\zapAudit\conf).
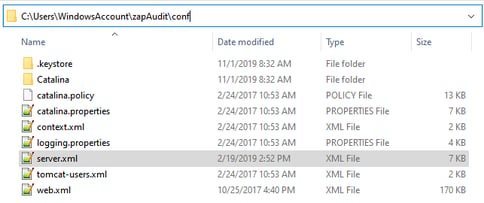
Select the server.xml file and search for all the ports for our software.
Change the ports for zapAudit from 8055 to 8065, 9001 to 9011 and 8059 to 8069.
Change the ports for zapCash from 8056 to 8066, 9002 to 9012 and 8060 to 8070.
Switch to other free ports until the software is running. You can always check the task manager if the software is up and running or shut down correctly.
Missing reading and writing rights

An error occured page after starting the software
Please check, if your Windows user account has full read and write permissions to the installation directory of the software. This may be the case if another windows user installed the software.
Execute with admin privileges: Install and execute the software with administrator privileges (right-click > run as administrator). You find the executable in the installation directory under /bin (e.g. zapAudit.exe)
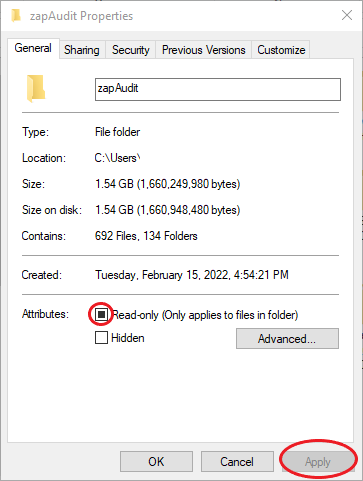
Uncheck read-only checkbox: Open the installation directory and right-click it. Select 'Properties'. Uncheck the read-only checkbox. Then startup the software.
Workaround for external drives: Copy the complete zapliance installation to your user directory (e.g. C:\users\MyAccount\) and try to start zapliance.
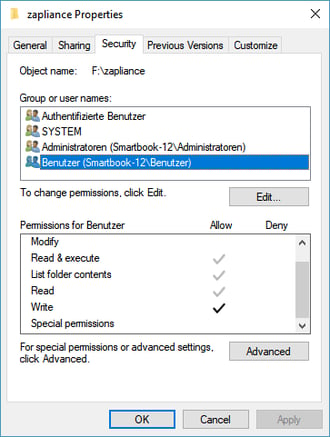
You can also grant your current windows user proper access permissions. To do so,
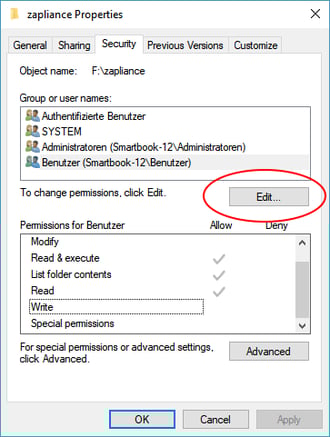
- Right-click on zapliance installation folder > Properties
- Check the Security tab
- Press 'Edit' if you do not have permissions for your user group
- Check the Write box and apply

- Now you have the right permissions